jinja template python

Understanding Jinja Templates in Python Flask
Flask is a lightweight web framework for Python that is simple yet powerful. One of the key features of Flask is its integration with Jinja, a templating engine that allows developers to create dynamic HTML pages. Jinja templates enable you to separate your application’s logic from its presentation, making your code cleaner and more maintainable.
In this article, we’ll explore Jinja templates in Flask, complete with code examples and explanations to help you get started.
Before starting with the code, let’s set up a virtual environment using Python (this is optional, but highly recommended).
# Create a virtual environment
python -m venv venv

# Activate the virtual environment
# On Windows
venv\Scripts\activate

# On macOS/Linux
source venv/bin/activate
Once the virtual environment is activated, next install flask:
pip install flaskNext, create a simple Flask application:
from flask import Flask, render_template

app = Flask(__name__)

@app.route('/')
def home():
  return render_template('index.html')

if __name__ == '__main__':
  app.run(debug=True)
We import Flask and render_template from the flask module in this example. We then create an instance of the Flask class and define a route for the home page. The render_template function tells Flask to render an HTML template called index.html
Creating Your First Jinja Template
Let’s create the index.html file in a folder named templates (Flask looks for templates in this directory by default):
/my_flask_app
-/templates
--index.html
-app.py
In index.html, you can write standard HTML. To make it dynamic, you can use Jinja syntax:
<!DOCTYPE html>
<html lang="en">
<head>
    <meta charset="UTF-8">
    <meta name="viewport" content="width=device-width, initial-scale=1.0">
    <title>Home Page</title>
</head>
<body>
    <h1>Welcome to the Home Page</h1>
    <p>{{ message }}</p>
</body>
</html>
{{ message }} is a Jinja expression in this template. It will be replaced with a value of the message variable when the template is rendered.
Passing Data to Templates
To pass data to a template, you can provide keyword arguments to the render_template function:
@app.route('/')
def home():
message = "Hello, Flask and Jinja!"
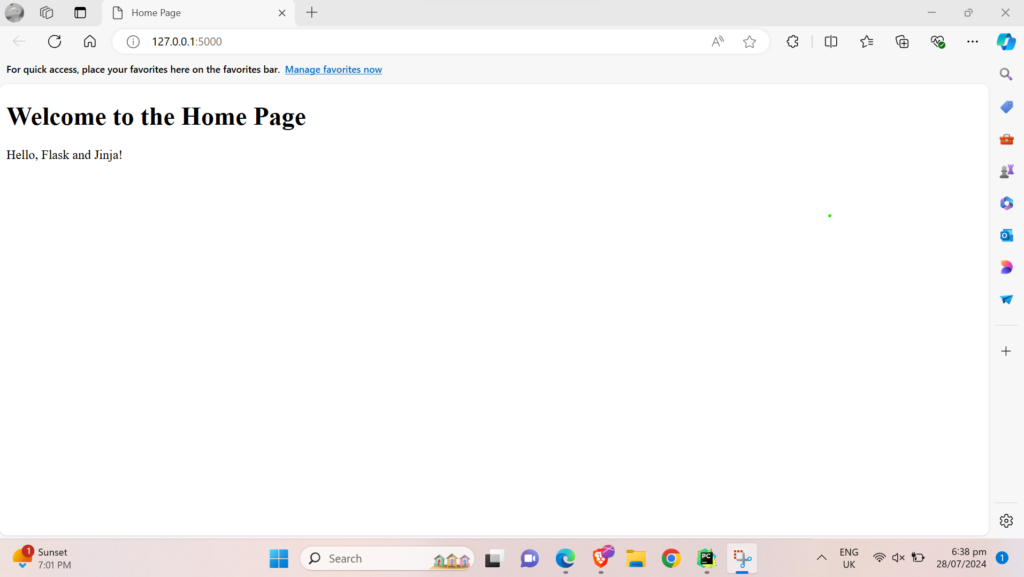
return render_template('index.html', message=message)Run the Flask application using:
python app.pyOn the home page, you’ll see “Hello, Flask and Jinja!” displayed in the paragraph tag. This shows how you can dynamically insert data into your HTML.
Jinja Template Syntax
Jinja provides several features that make your templates more powerful and flexible. Let’s explore some of the common syntax elements.
Variables
You can use double curly braces to output variables in your templates:
<p>{{ username }}</p>Filters
Filters modify the output of variables. For example, to convert a string to uppercase, you can use the upper filter:
<p>{{ username|upper }}</p>Also, You can chain multiple filters together:
<p>{{ username|upper|trim }}</p>Control Structures
Jinja supports control structures like `if` statements and loops. Because there might be some scenarios that need the usage of if statements and loops.
You may like: Python FastAPI and Graphql Tutorial
If Statements
Use {% %} to denote control structures. Here’s an example of an if and else statement:
{% if is_logged_in %}
    <p>Welcome back, {{ username }}!</p>
{% else %}
    <p>Please log in.</p>
{% endif %}
For Loops
You can iterate over lists or dictionaries with for loops, inside a .HTML file.
<ul>
    {% for item in items %}
        <li>{{ item }}</li>
    {% endfor %}
</ul>
Template Inheritance
Template inheritance allows you to create a base template and extend it in other templates. This is useful for maintaining a consistent layout across your website.
This is common practice, as there are a lot of websites on the internet, where the navbar and footer remains the same. So, template inheritance comes in handy in such conditions, and template inheritance also ensures code reusability.
Create a base template called base.html:
<!DOCTYPE html>
<html lang="en">
<head>
    <meta charset="UTF-8">
    <meta name="viewport" content="width=device-width, initial-scale=1.0">
    <title>{% block title %}My Website{% endblock %}</title>
</head>
<body>
    <header>
        <h1>My Website</h1>
    </header>
    <nav>
        <ul>
            <li><a href="/">Home</a></li>
            <li><a href="/about">About</a></li>
        </ul>
    </nav>
    <main>
        {% block content %}{% endblock %}
    </main>
    <footer>
        <p>© 2024 My Website</p>
    </footer>
</body>
</html>
`Then, create a child template called index.html that extends base.html:
{% extends 'base.html' %}
{% block title %}Home Page{% endblock %}
{% block content %}
<h2>Welcome to the Home Page</h2>
<p>{{ message }}</p>
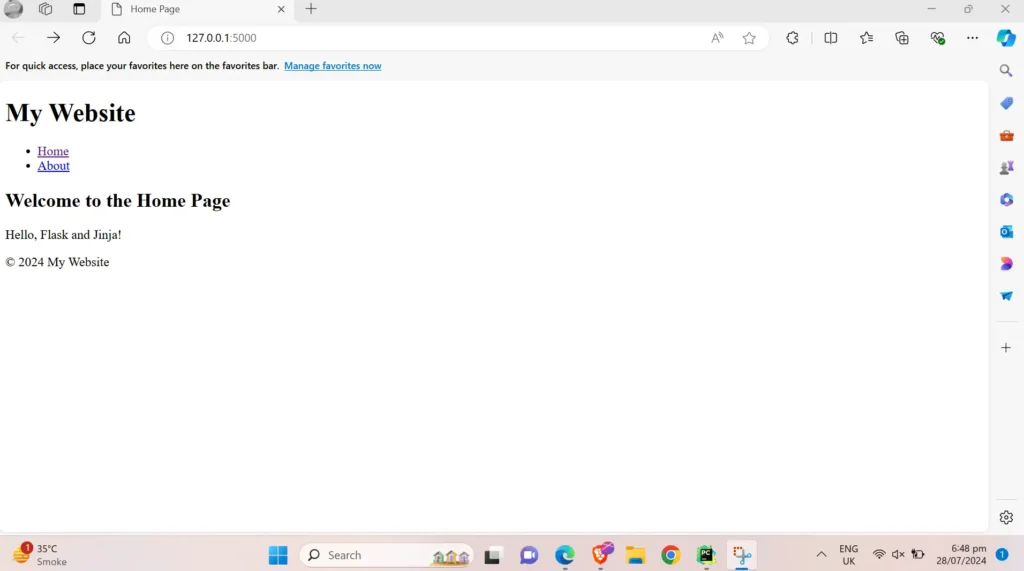
{% endblock %}In this example, the extends tag tells Jinja to use base.html as the base template. The block tags define sections that can be overridden in the child template.
The browser will show something like this on http://127.0.0.1:5000
Recommended Article: Rest vs Graphql vs GRPC
Macros
Macros are like functions in templates. They allow you to reuse chunks of template code.
Define a macro in a separate file called macros.html:
{% macro render_item(item) %}
    <li>{{ item }}</li>
{% endmacro %}
Then, include and use the macro in another template:
{% import 'macros.html' as macros %}
<ul>
    {% for item in items %}
        {{ macros.render_item(item) }}
    {% endfor %}
</ul>
Template Includes
You can include one template inside another using the include statement. This is useful for components like headers and footers.
Create a header template called header.html:
<header>
    <h1>My Website</h1>
</header>
Include it in base.html:
<!DOCTYPE html>
<html lang="en">
<head>
    <meta charset="UTF-8">
    <meta name="viewport" content="width=device-width, initial-scale=1.0">
    <title>{% block title %}My Website{% endblock %}</title>
</head>
<body>
    {% include 'header.html' %}
    <nav>
        <ul>
            <li><a href="/">Home</a></li>
            <li><a href="/about">About</a></li>
        </ul>
    </nav>
    <main>
        {% block content %}{% endblock %}
    </main>
    <footer>
        <p>© 2024 My Website</p>
    </footer>
</body>
</html>
Working with Forms
Handling forms is a common task in web development. There are a lot of scenarios where we might require forms to gather user input data.
Jinja makes it super easy to create and process forms.
Create a form template called form.html:
<!DOCTYPE html>
<html lang="en">
<head>
    <meta charset="UTF-8">
    <meta name="viewport" content="width=device-width, initial-scale=1.0">
    <title>Form Example</title>
</head>
<body>
    <h1>Submit Your Details</h1>
    <form action="/submit" method="post">
        <label for="name">Name:</label>
        <input type="text" id="name" name="name"><br>
        <label for="email">Email:</label>
        <input type="email" id="email" name="email"><br>
        <button type="submit">Submit</button>
    </form>
</body>
</html>
Define a route to handle the form submission in app.py:
from flask import Flask, render_template, request

app = Flask(__name__)

@app.route('/')
def home():
    return render_template('form.html')

@app.route('/submit', methods=['POST'])
def submit():
    name = request.form['name']
    email = request.form['email']
    return f"Received name: {name} and email: {email}"

if __name__ == '__main__':
    app.run(debug=True)
In this example, the form sends a POST request to the /submit route, where we retrieve the form data using request.form and display it.
When you run the flask app, you will need to fill up these details:
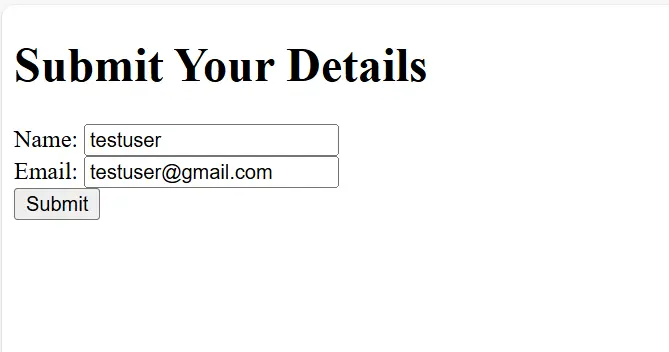
On successful submission, you will see this text on the next page:
Received name: testuser and email: testuser@gmail.comConclusion
Jinja templates in Flask offer a powerful way to create dynamic and maintainable web applications. By separating your application’s logic from its presentation, you can build cleaner and more organized code.
This article covered the basics of Jinja syntax, template inheritance, macros, includes, and form handling. With these tools at your disposal, you’re well-equipped to build robust and dynamic web applications using Flask and Jinja.
Talha is a seasoned Software Engineer with a passion for exploring the ever-evolving world of technology. With a strong foundation in Python and expertise in web development, web scraping, and machine learning, he loves to unravel the intricacies of the digital landscape. Talha loves to write content on this platform for sharing insights, tutorials, and updates on coding, development, and the latest tech trends